Initial Environment Configuration
Creating the First Administrator
After installing your Reemo instance, the first step is to create an Instance Administrator account. This account will serve as the entry point for the global administration of the platform.
To configure this first administrator account, go to the following URL on your portal:
https://<your-domain>/register/admin
Note
If you have enabled the dedicated administration portal feature, you must connect to this portal via the URL:
https://<your-admin-portal>/register/admin
to correctly declare the first administrator account.
Note
If you haven’t declared a domain, you can use the IP address of your portal:
https://<ip>/register/admin
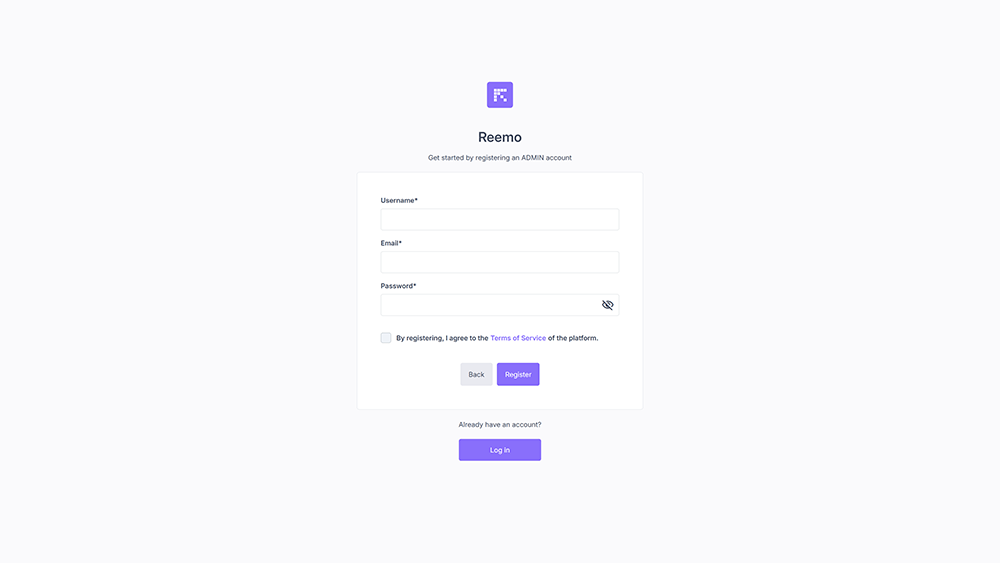
Form for creating the first administrator account
Fill in the required fields:
Username: Unique identifier for the administrator.
Email: Contact address for the administrator.
Password: Password associated with the account.
Once the form is submitted, the administrator account is created, and the /register/admin route is automatically disabled for security reasons.
It will no longer be possible to recreate an administrator from this page.
Creating an Organization
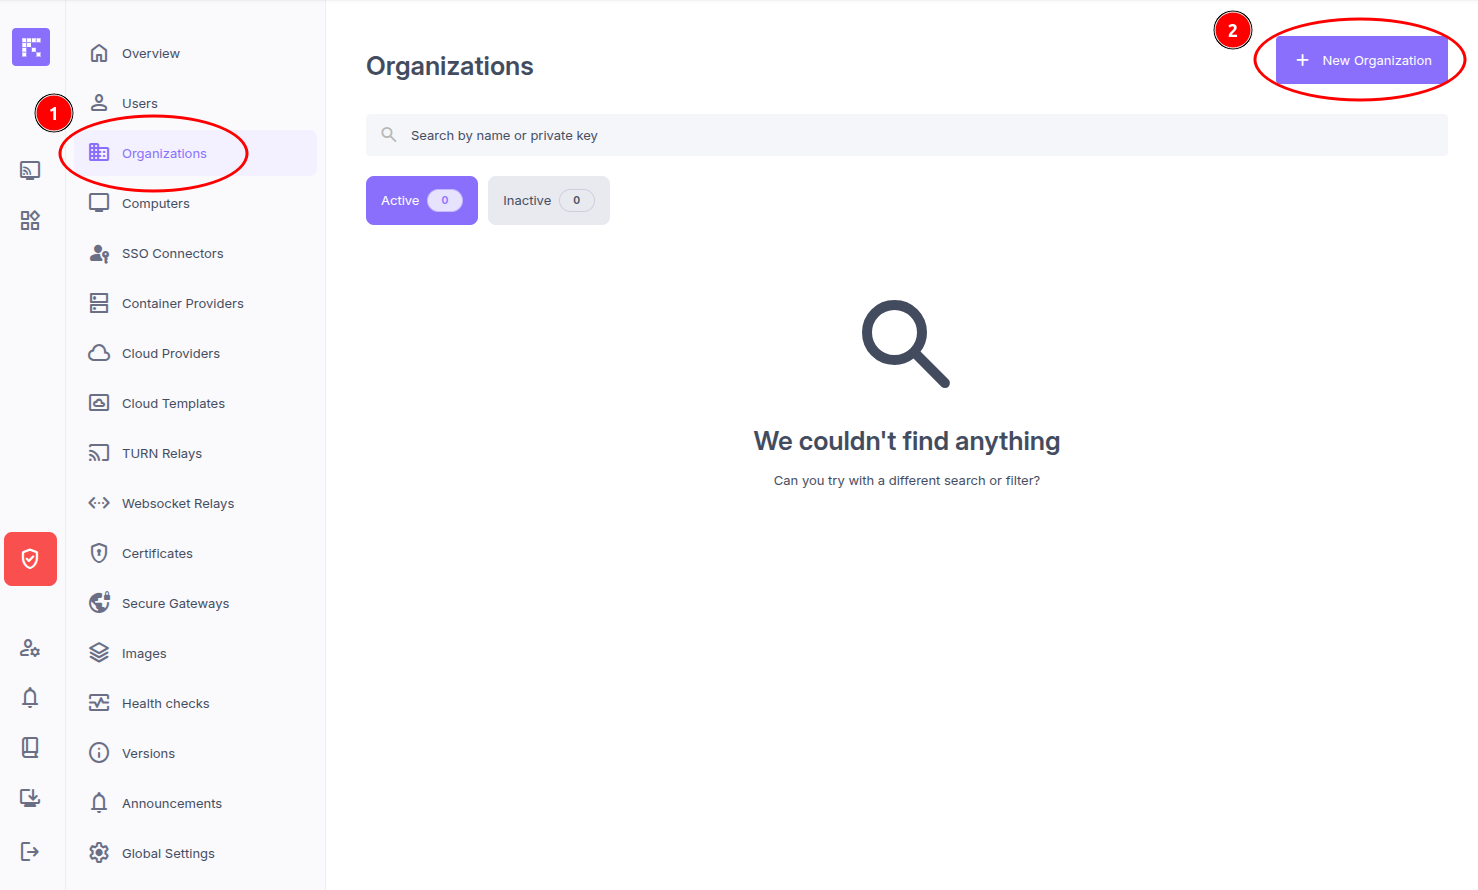
Click on the Admin Area menu, then on Organizations, and finally on the New Organization button.
Fill in the following fields:
Name: Name of the organization.
Short Name: Name used to dedicate containers to this organization.
Features: Select Containers.
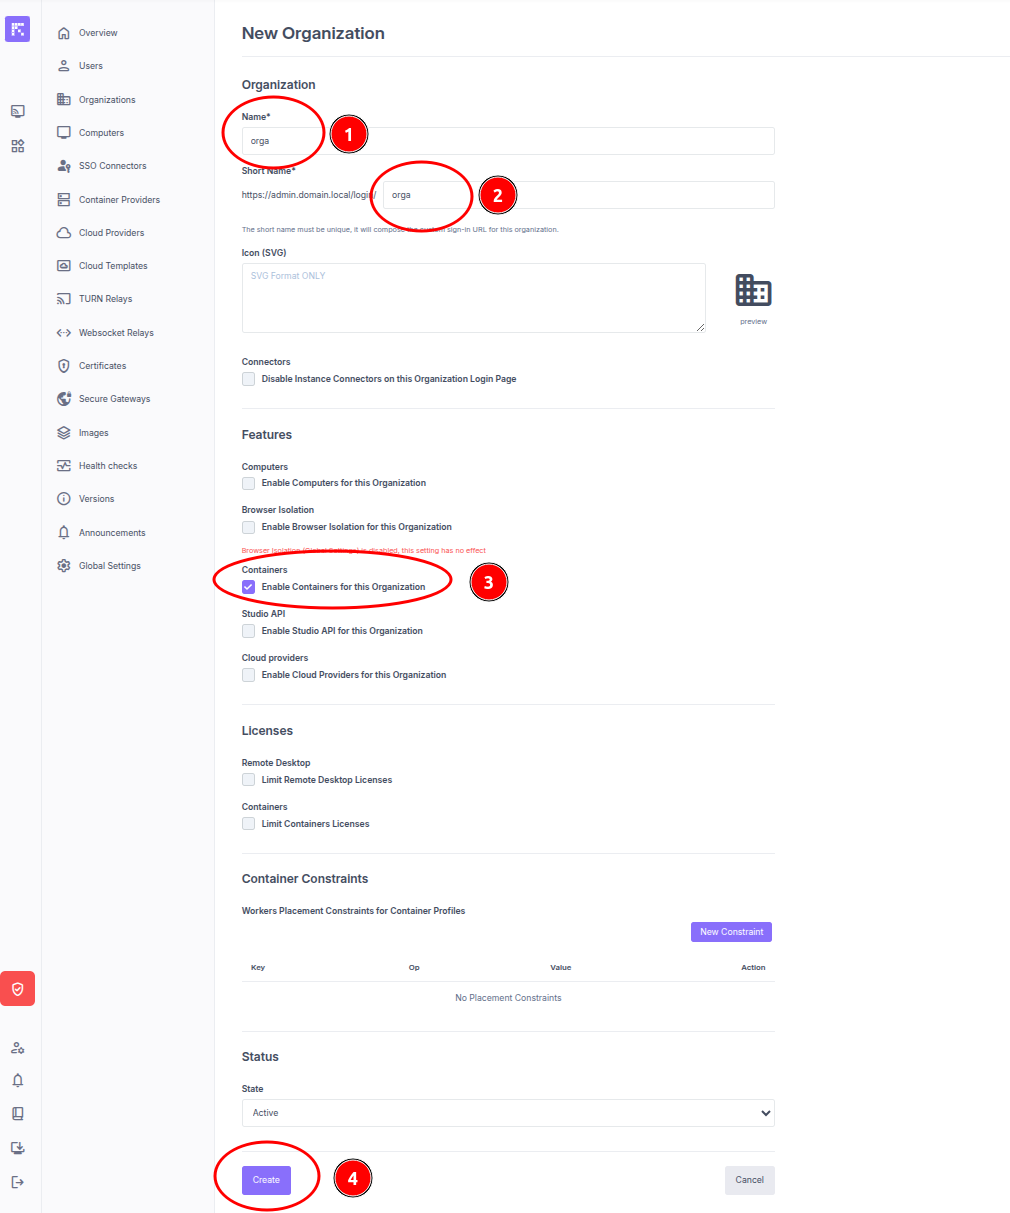
Submit the form by clicking on Create.
Creating the First Container Profile
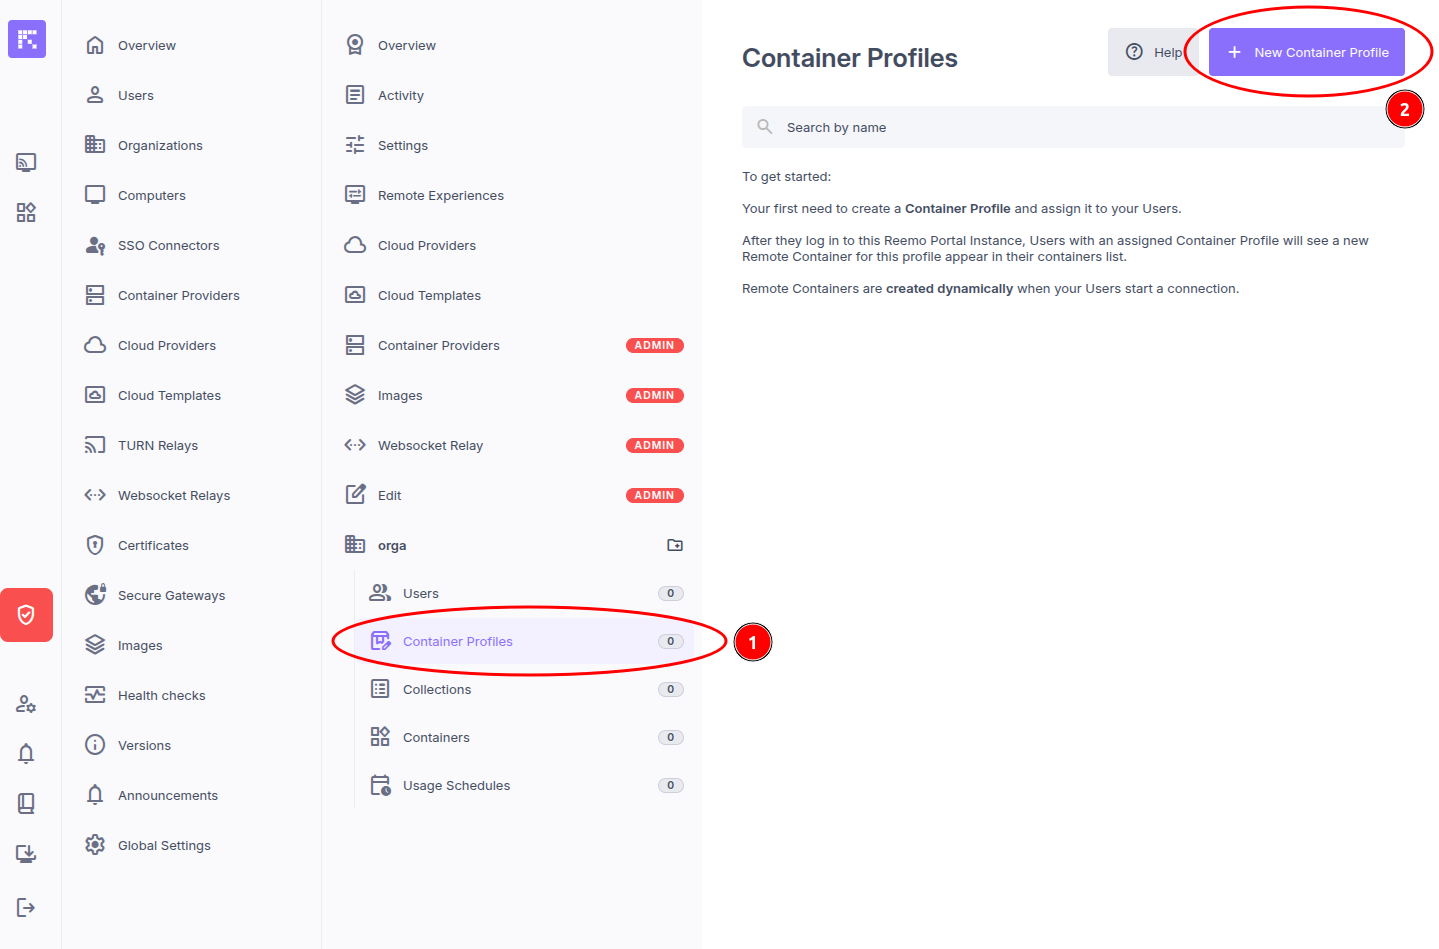
Go to the newly created organization, then click on the Container Profiles menu.
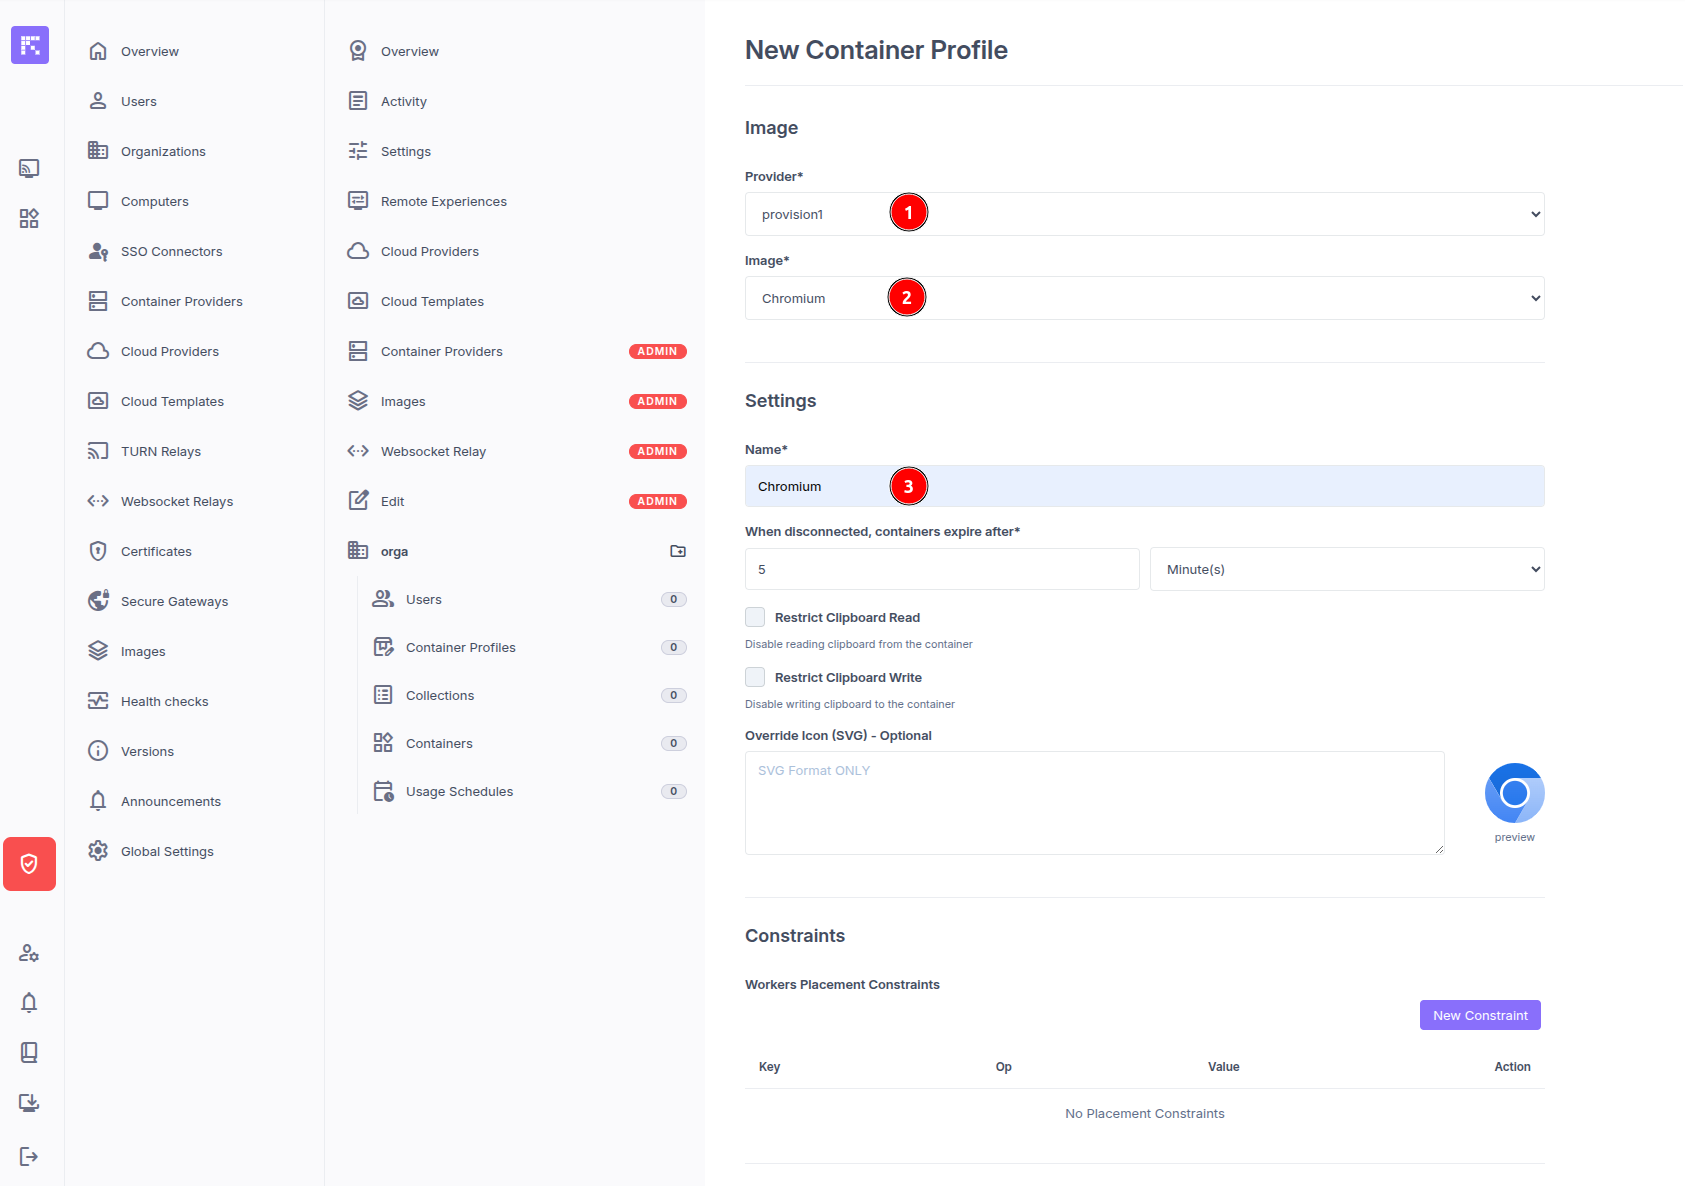
Select the Provider (which determines the provisioning environment where the container will be deployed).
Then, select the image (on a default installation, only the Chromium profile is available).
By selecting the Chromium image, a form appears at the bottom of the page allowing you to configure the container options.
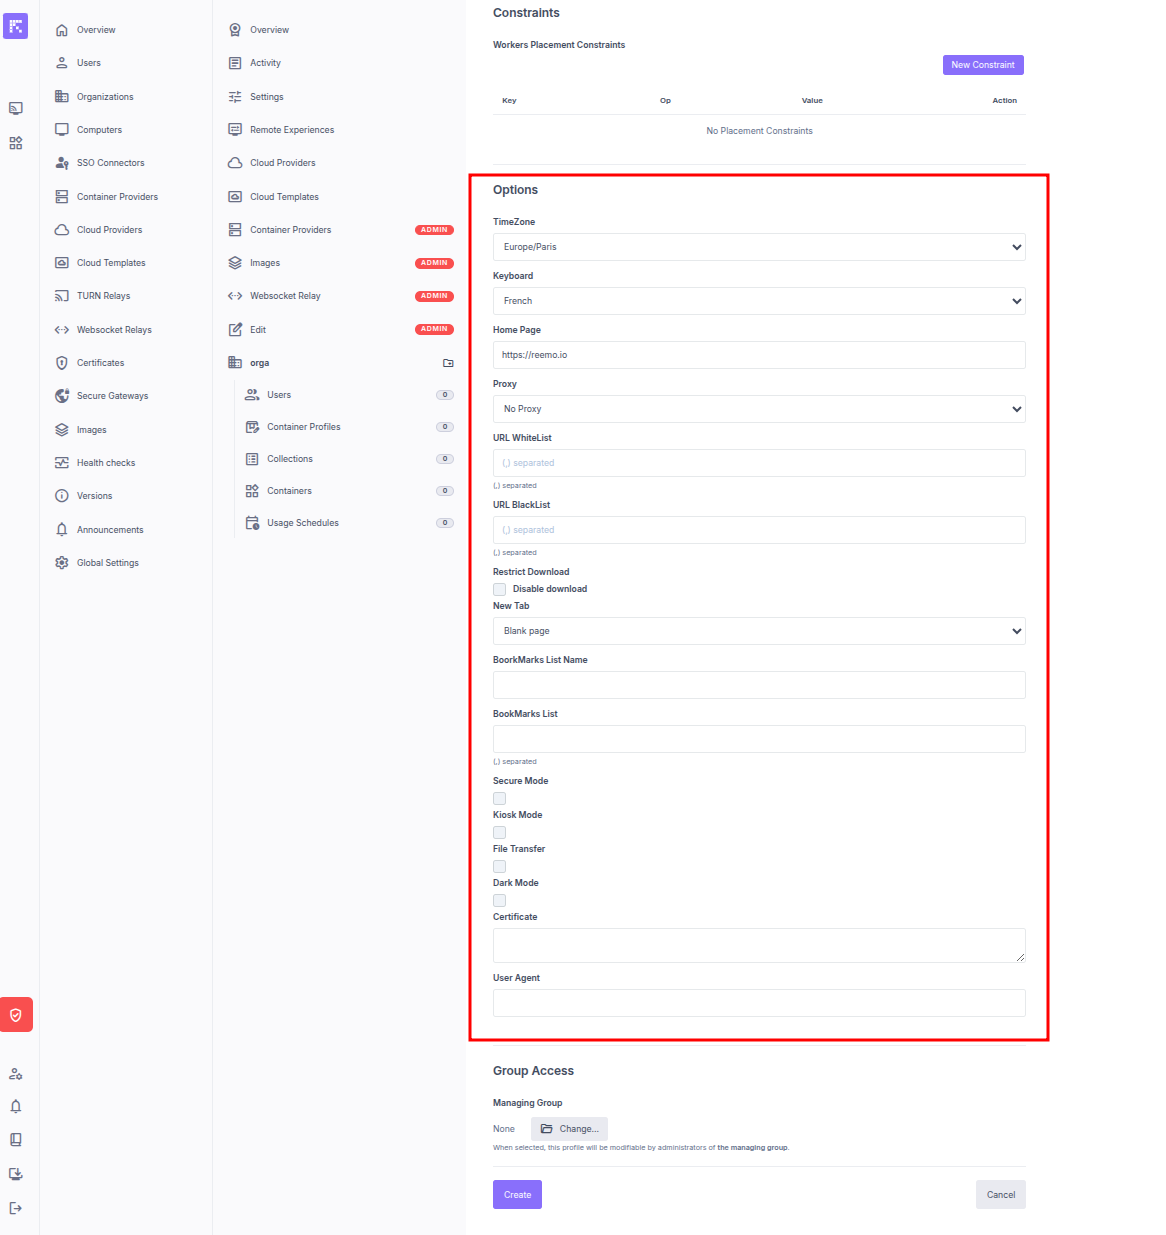
For standard internet browsing usage, leave the default options: the user will have access to the standard features of a web browser to surf the Internet.
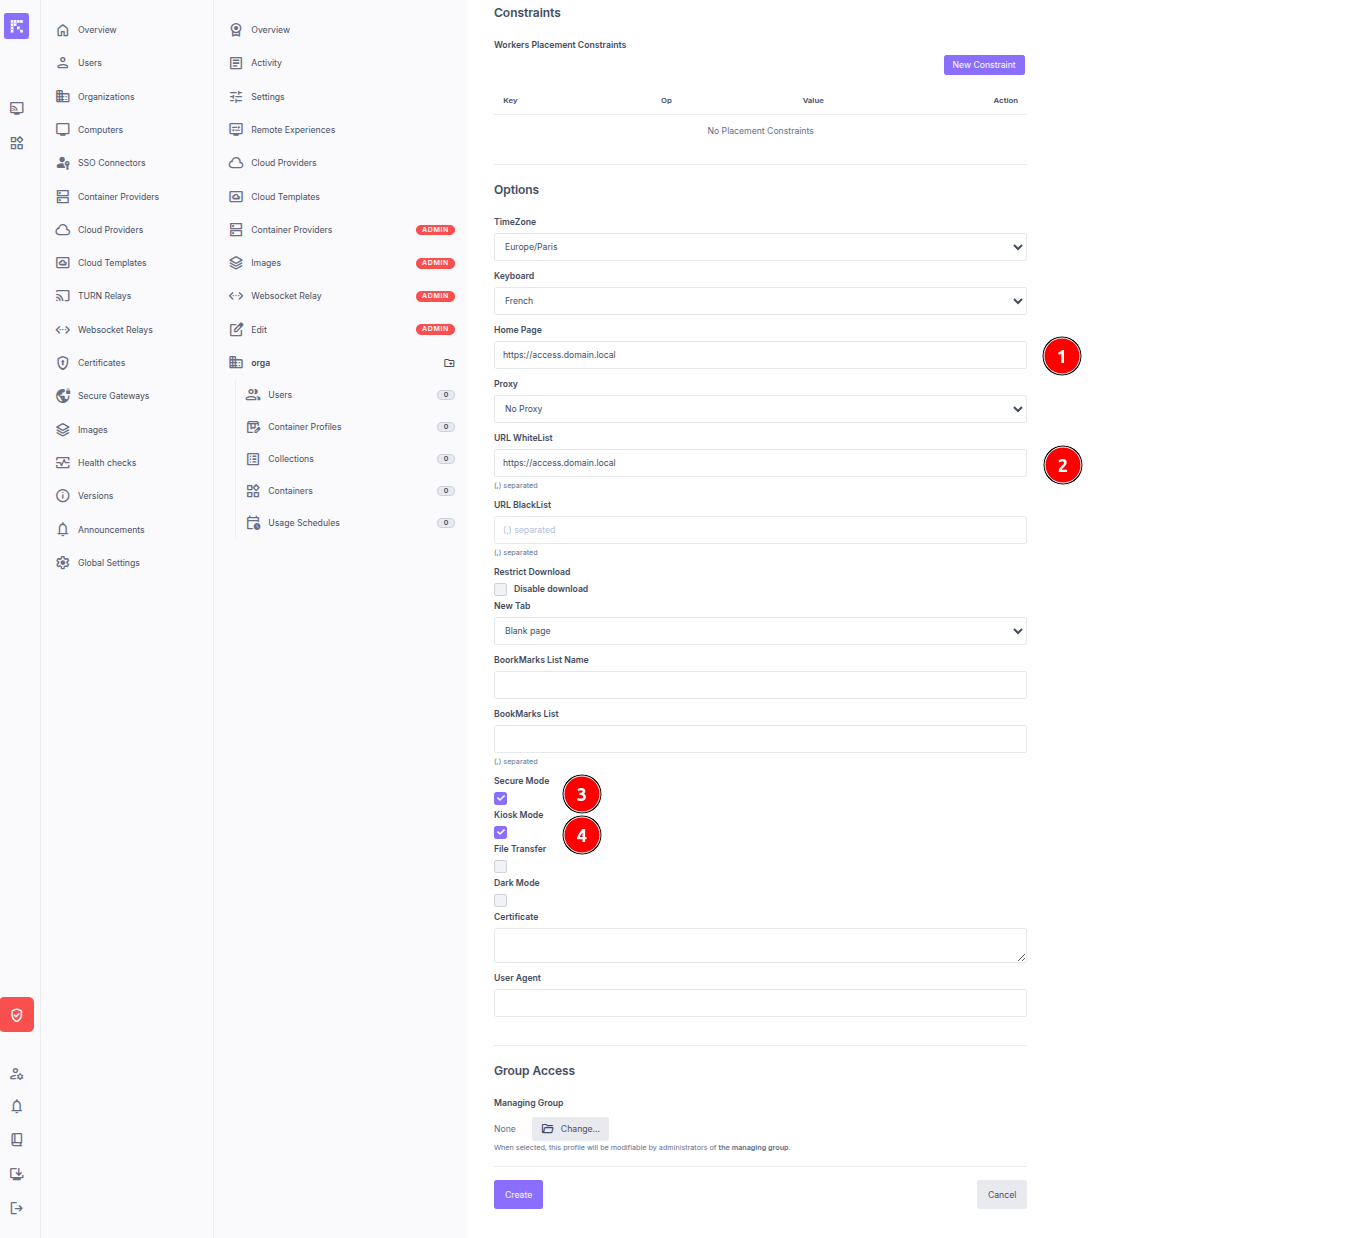
For a Bastion type usage (securing access to an internal HTTP/HTTPS resource), here is an example of a typical configuration:
Creating the First User
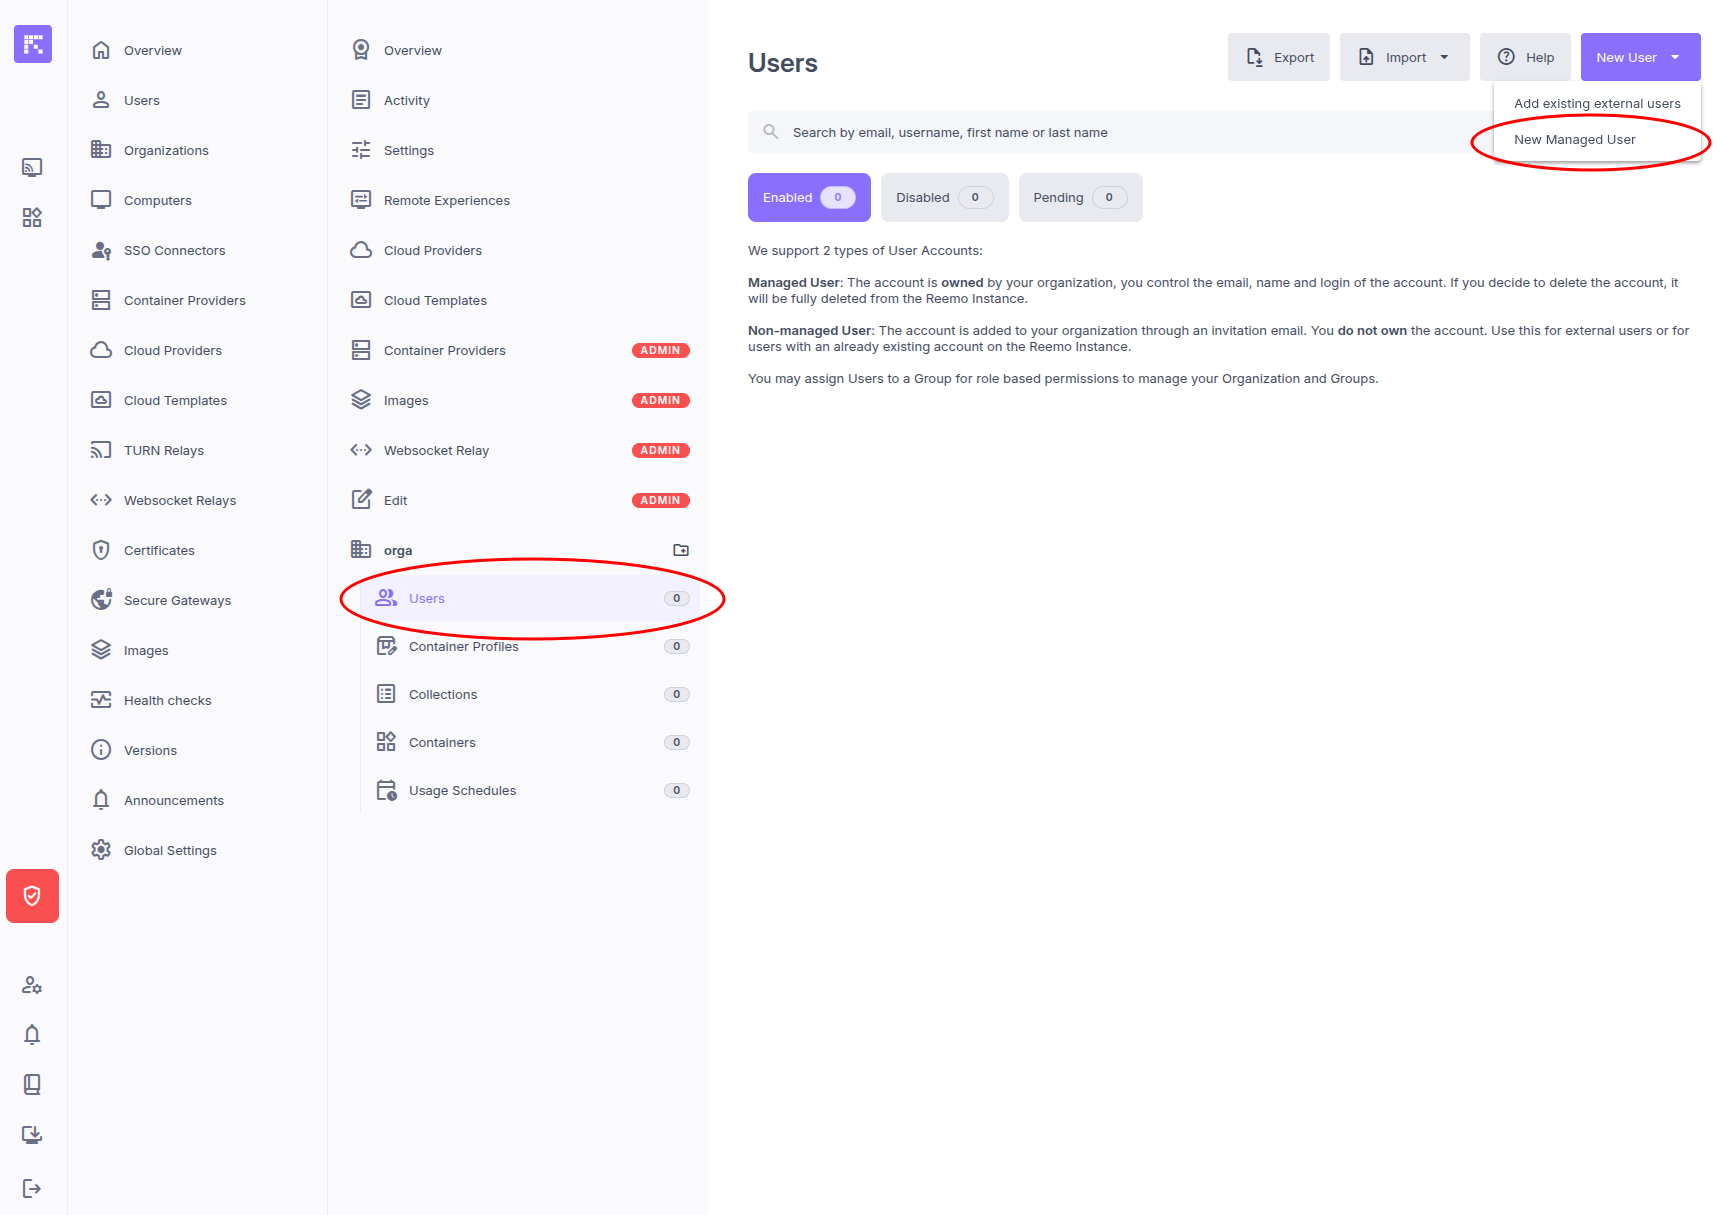
Still within the same organization, click on the Users menu, the New User button, and then New Managed User.
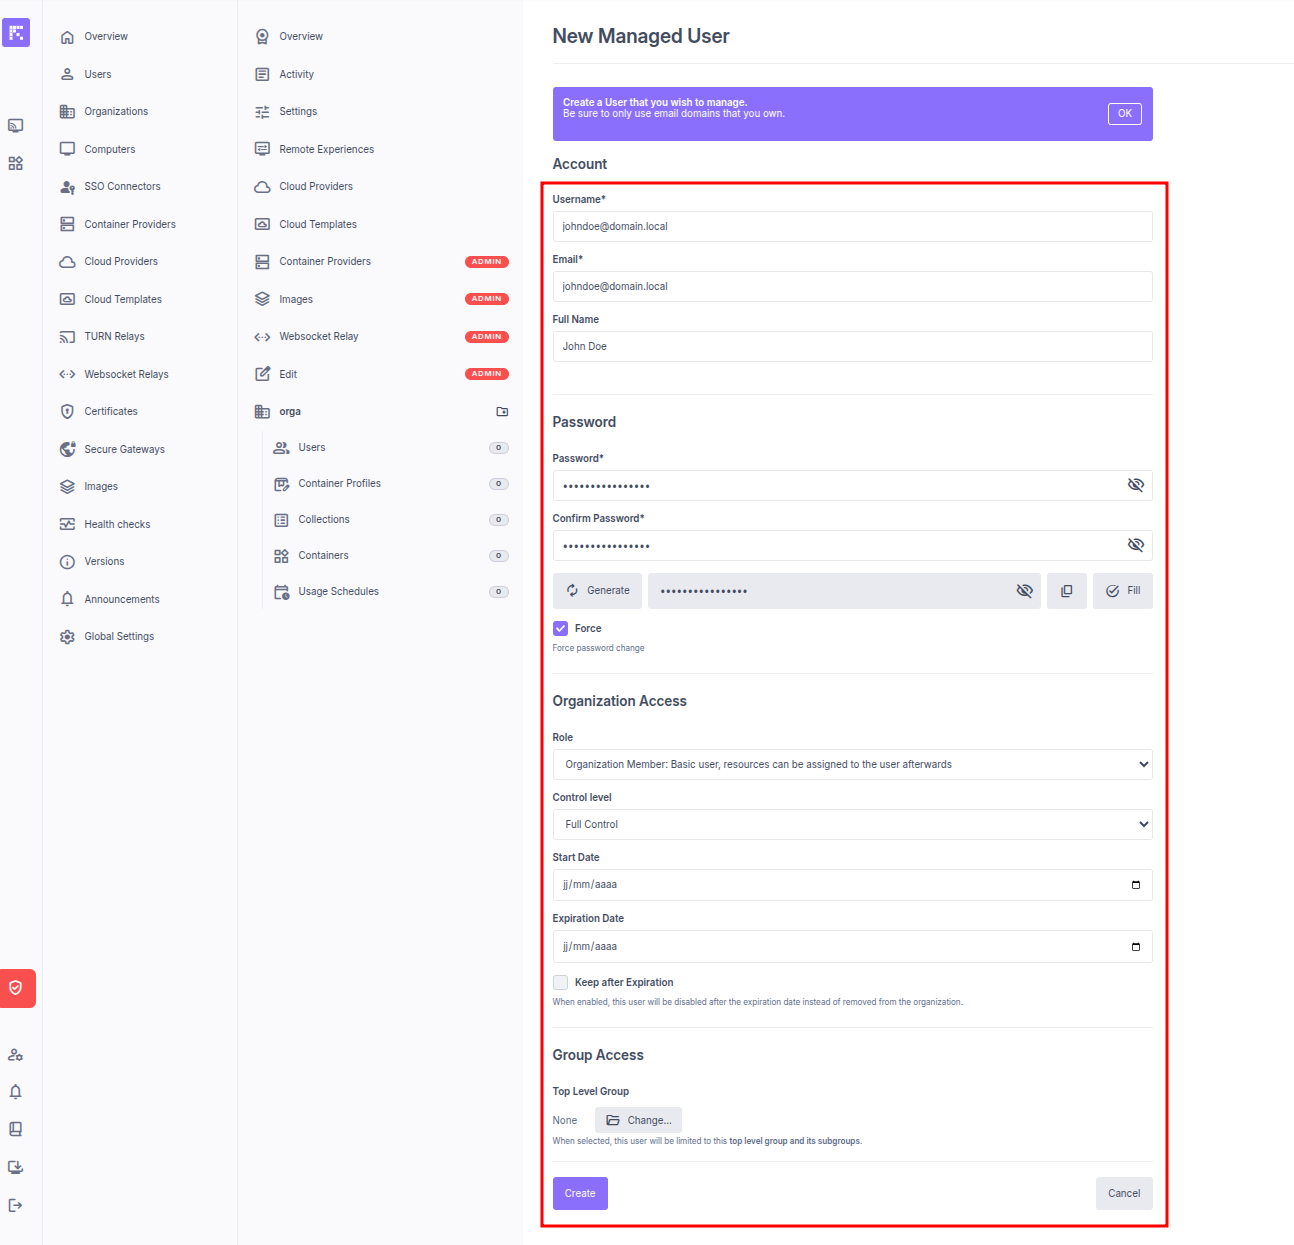
Fill in the necessary information for your user.
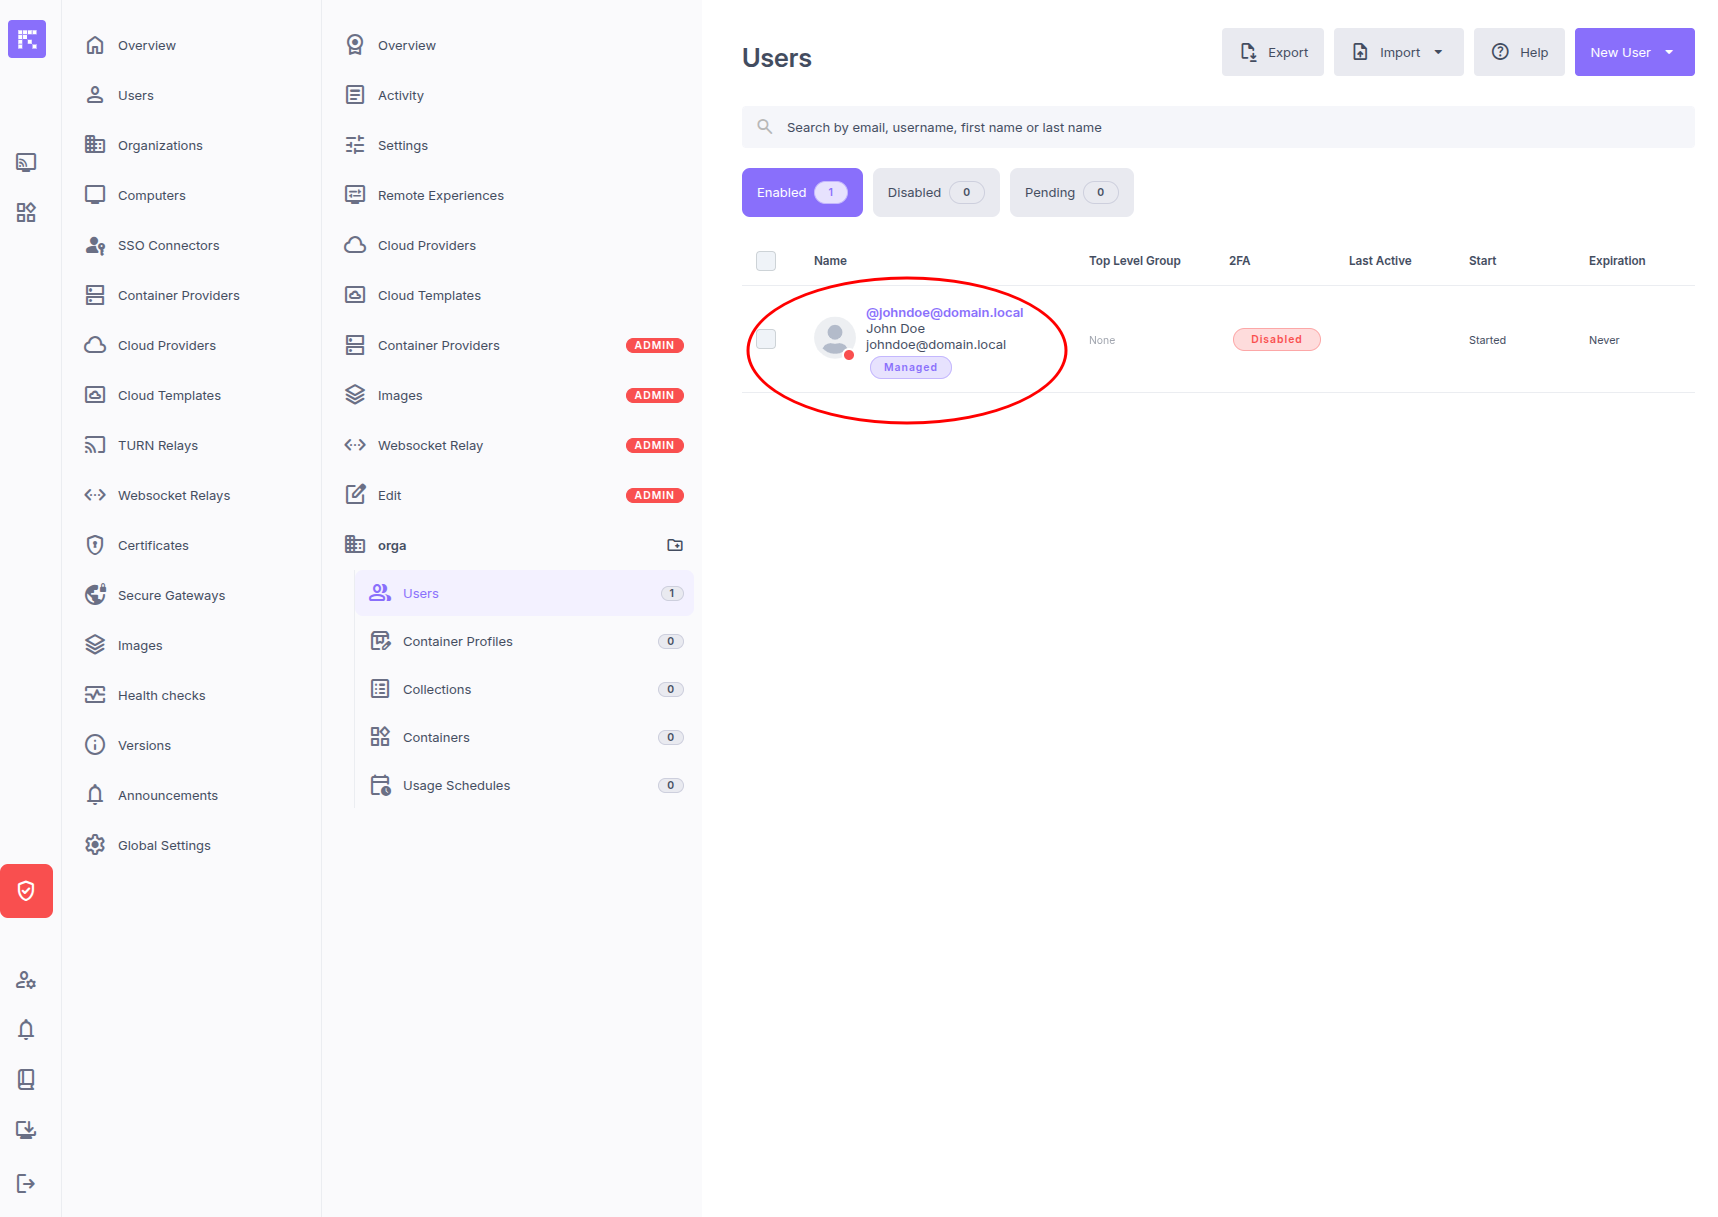
Click on Create to confirm.
Assigning the Container Profile to the User
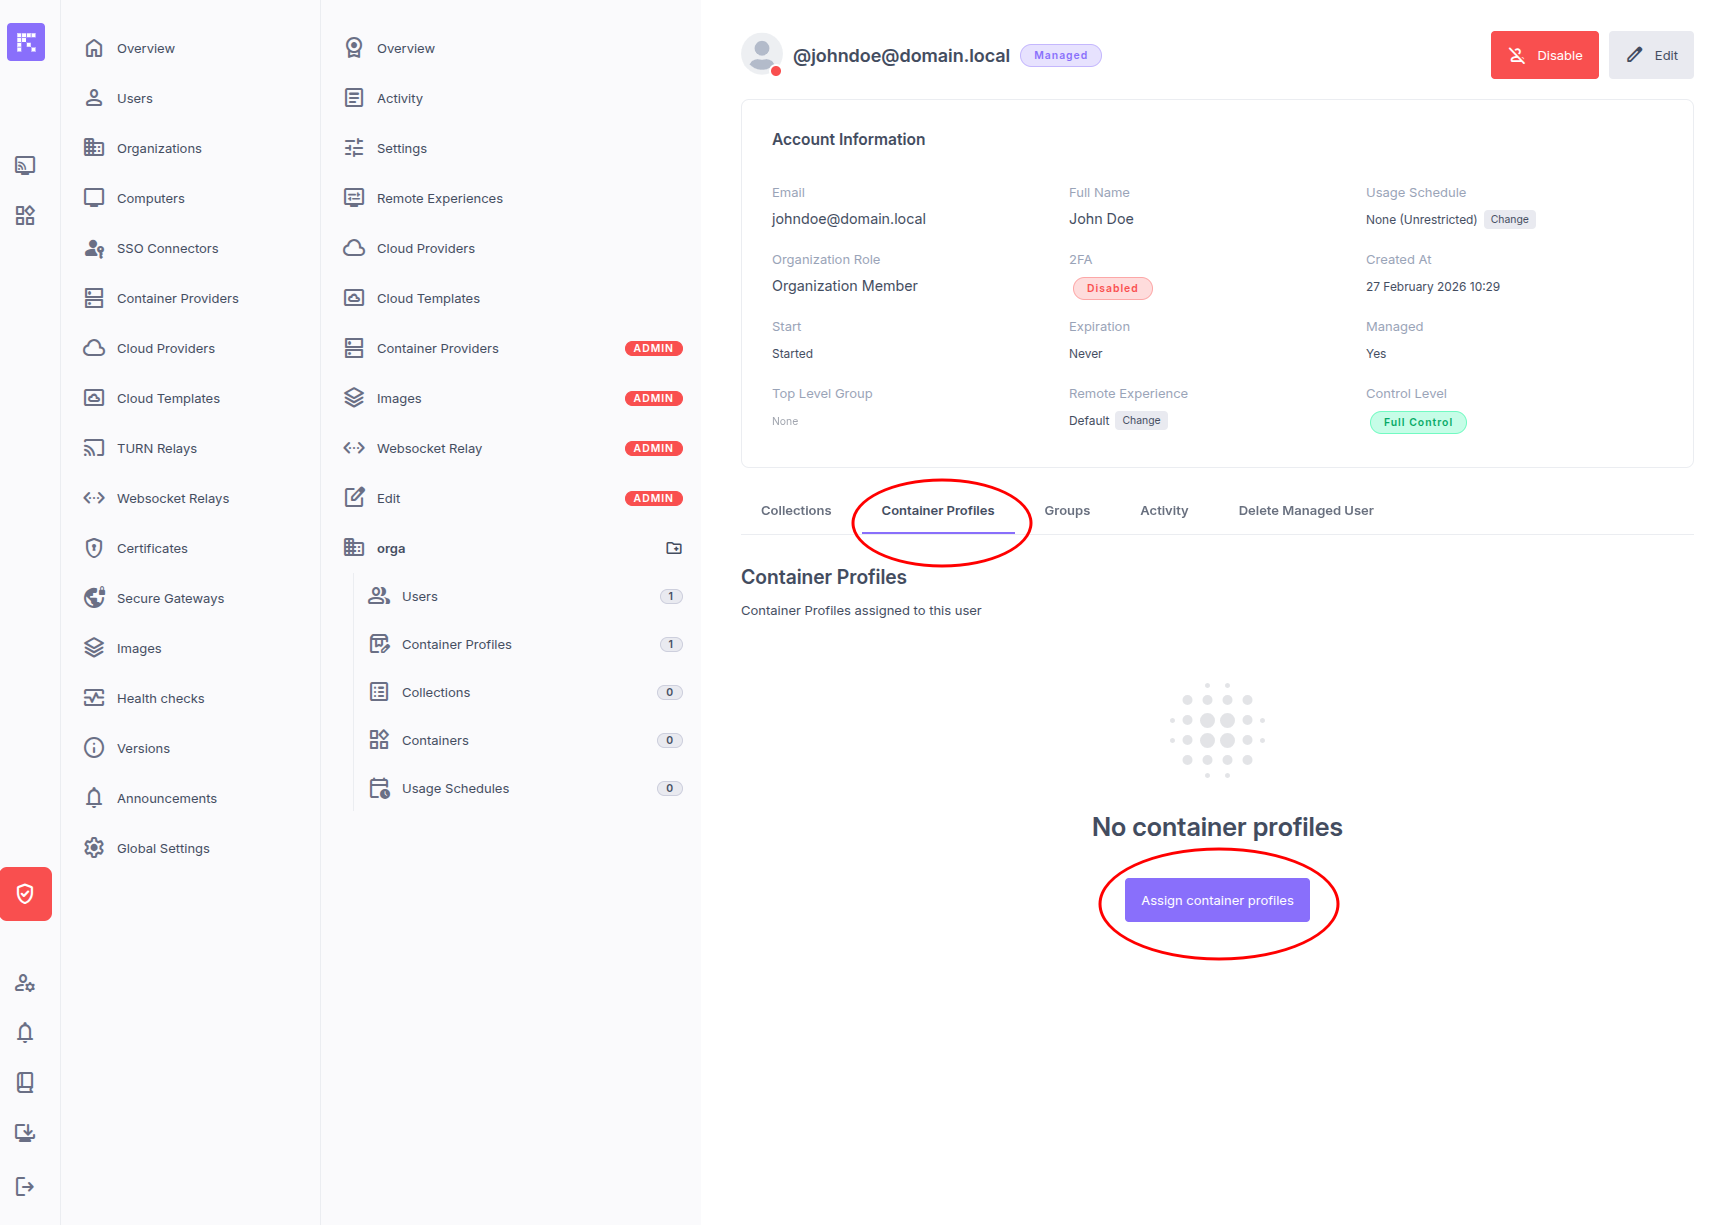
Click on the newly created user.
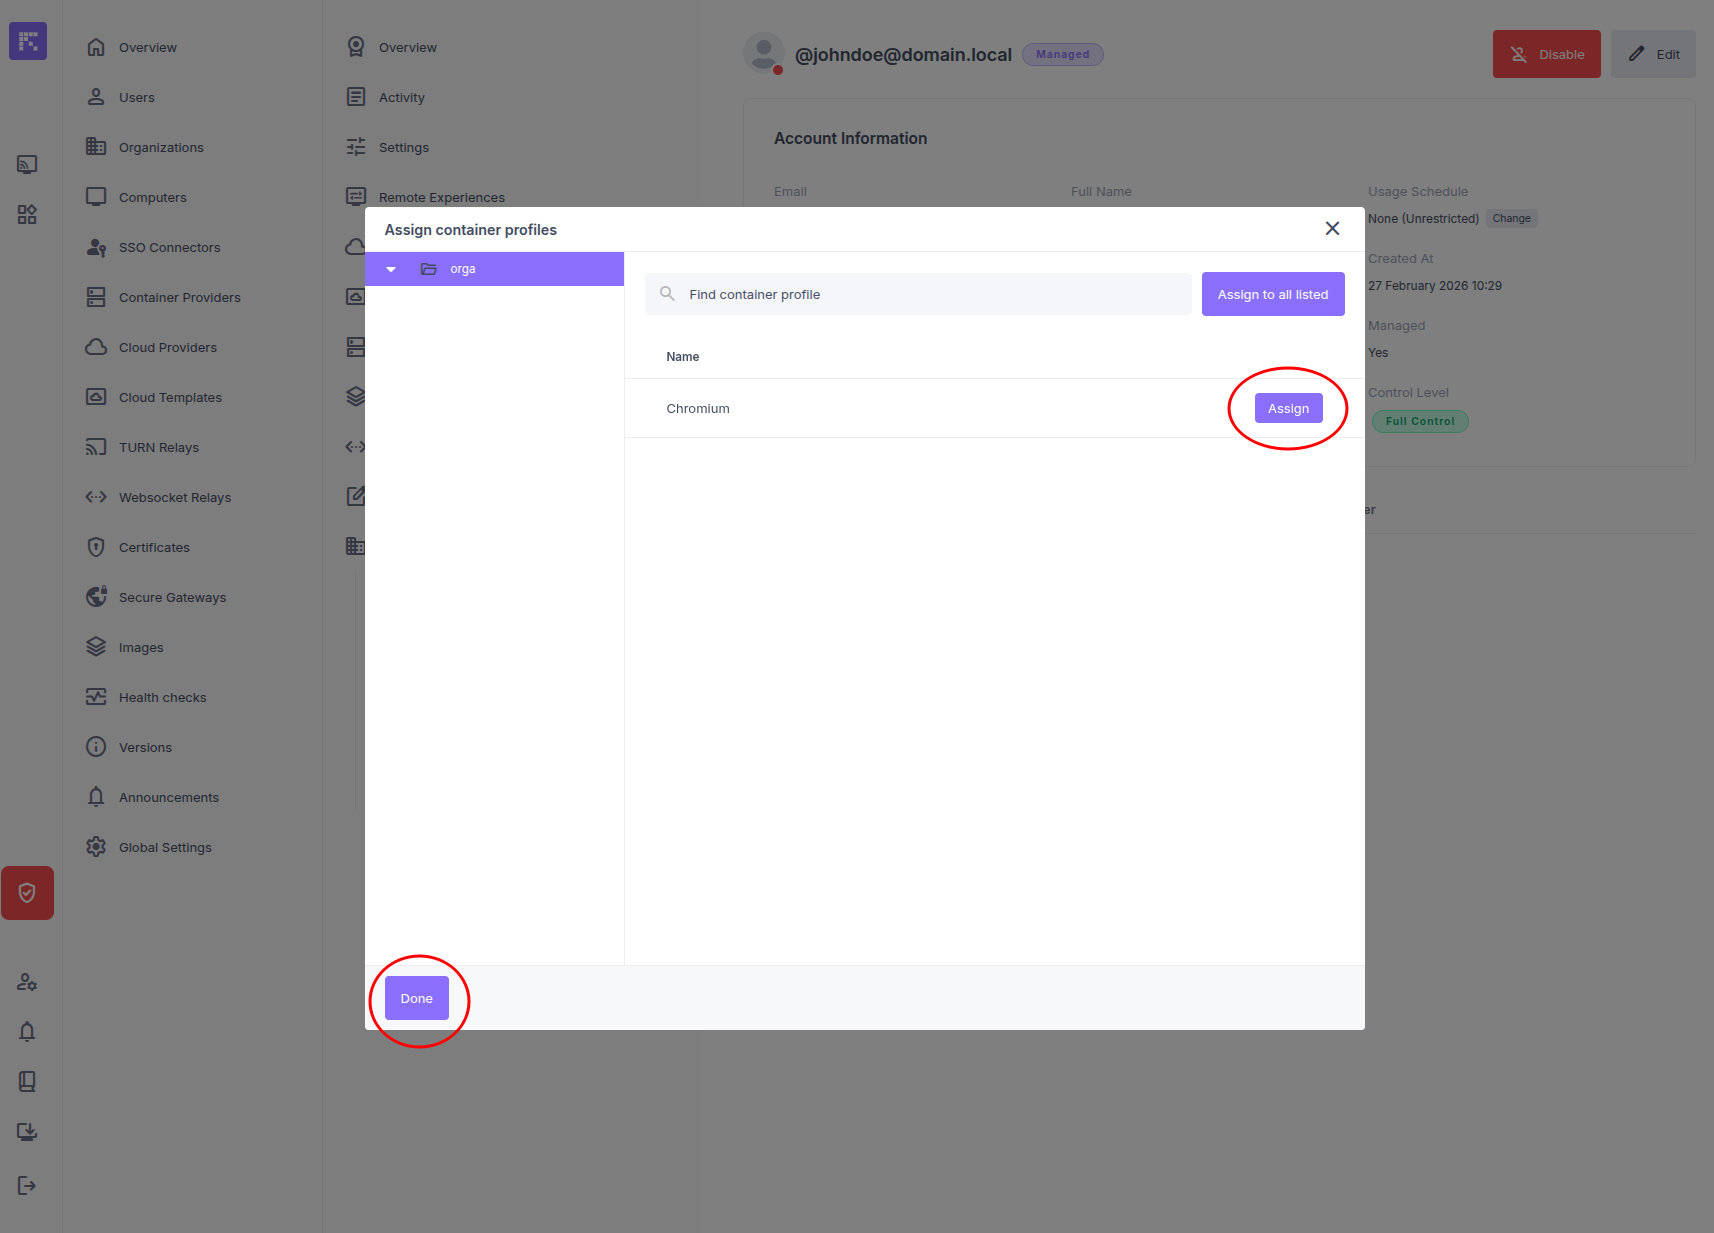
In the Container Profiles tab, click on Assign container profiles.
Click on Assign, then on Done to link the profile to the user.
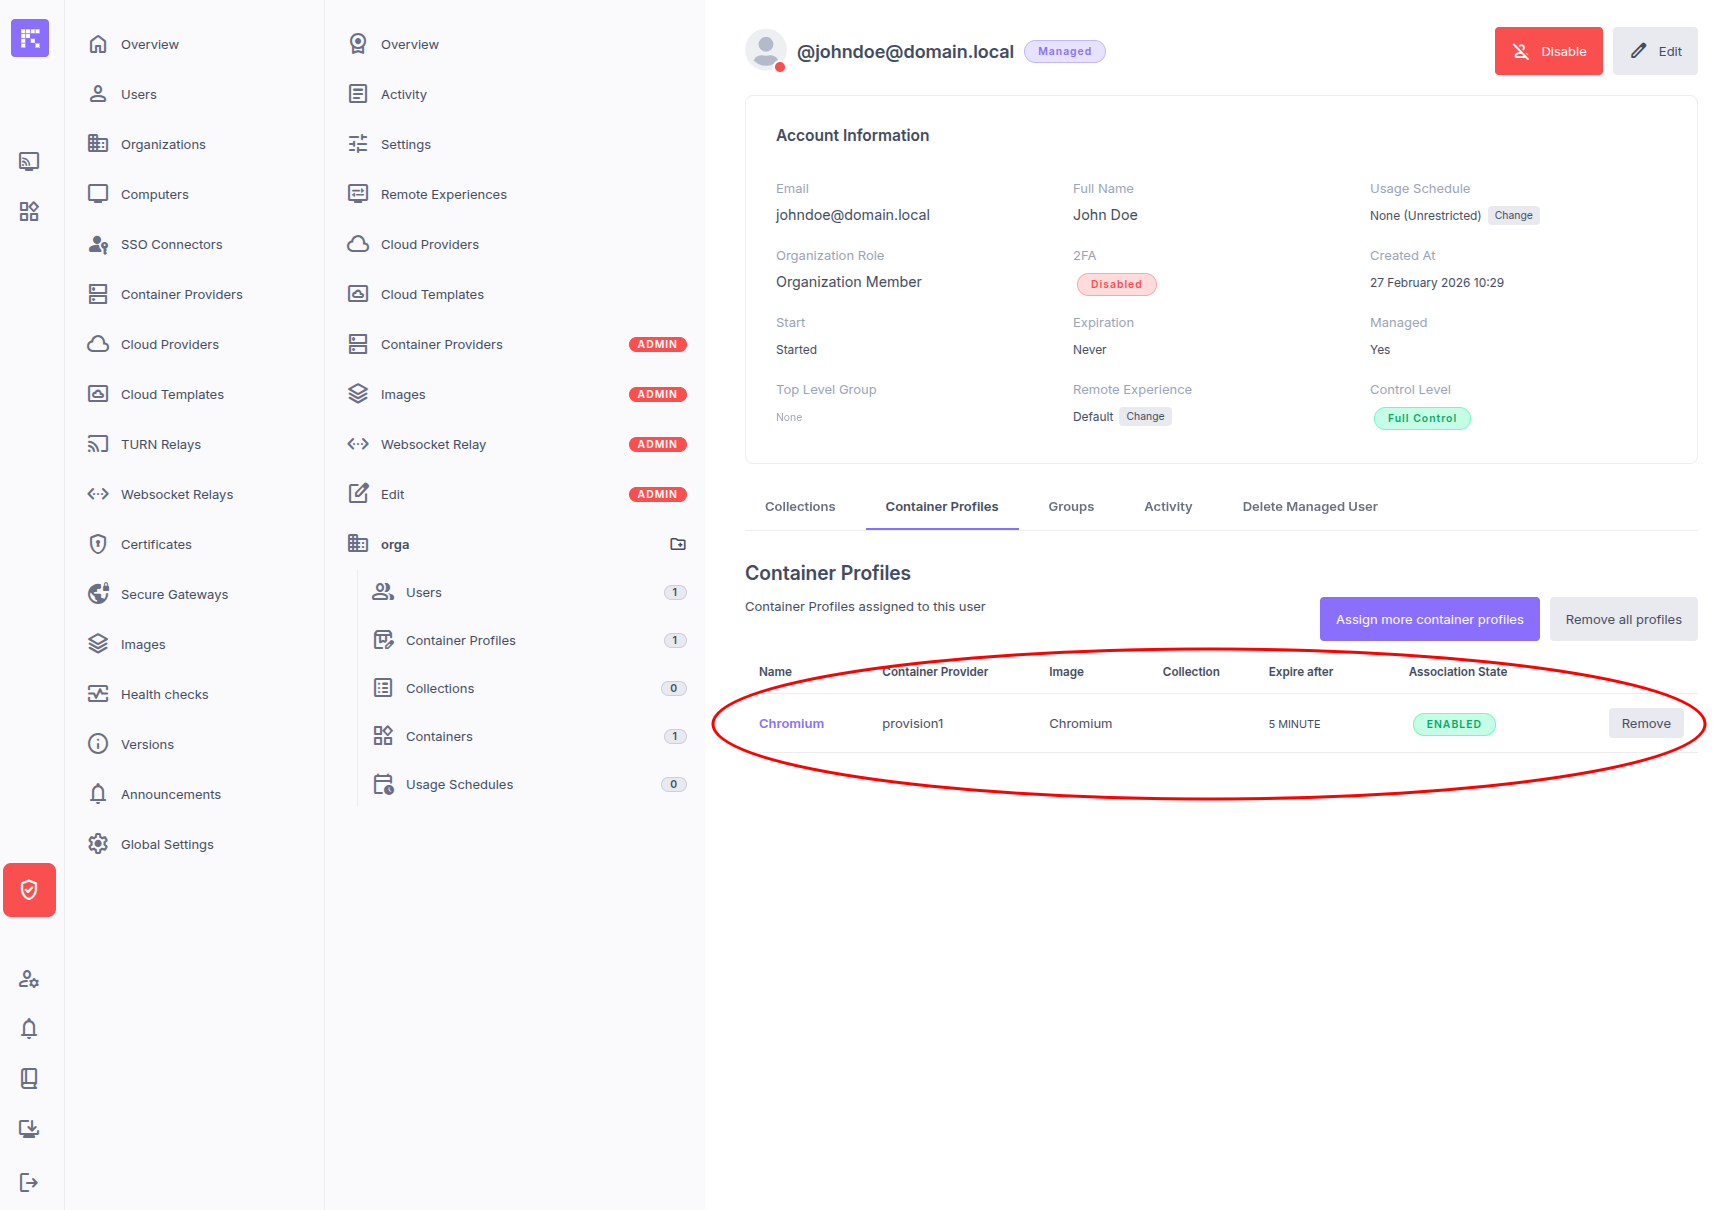
The profile will now appear in the user’s details.
First User Login
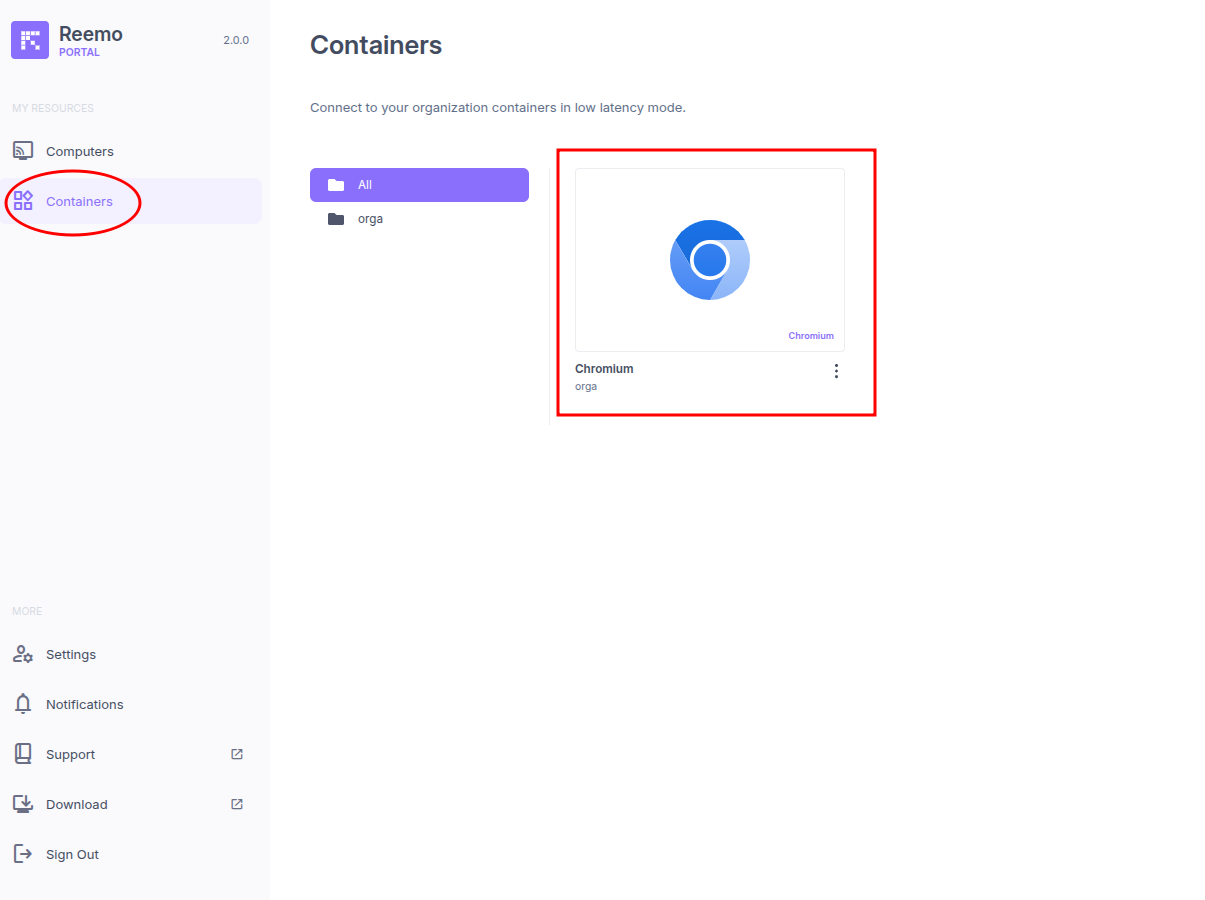
When the user logs in to the user portal, they will see the resource appear in their Containers menu.