Account Settings
The Account Settings page allows you to manage your personal profile, enhance your security, and review your connection history.
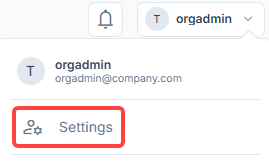
To access your settings, open the User Menu and select manage_accounts Settings.
General
Manage your personal information and Reemo identity. The fields available in this section depend on your account type.
Important
If your account is managed by an organization (Managed user account), you cannot change your personal information or delete your account.
Account: Update your Username and Full Name (optional), then click Update to save your changes.
Email Address: Enter a new login email and click Update email. A 6-digit verification code will be sent to the new address to confirm the change.
Personal Key: View or copy your key, used to link remote computers to your account.
Organizations: View the organizations you belong to and your current role (e.g., Member, Admin, Owner).
Delete Account: Permanently erase your Reemo account. Enter your password in the provided field and click Delete My Account to confirm. If your account is managed by an organization or if you are an Owner of an organization, you cannot delete your account right away: a managed account cannot be deleted at all, and an Owner must first transfer ownership of their organization.
Note
Your Personal Key is specific to your account and links your own personal computers. If you are an organization administrator, you also have access to a Studio Key (at the organization level) and, for each group, a Group Key. A purely administrative account (e.g. an instance administrator), with no personal computer to link, may not show this section.
Security
Protect your account by managing your credentials and enabling multi-factor authentication (2FA). Two main actions are available:
Enable or modify Two-Factor Authentication (2FA) to secure your account.
Change your Password by entering your current password, then a new one to confirm.
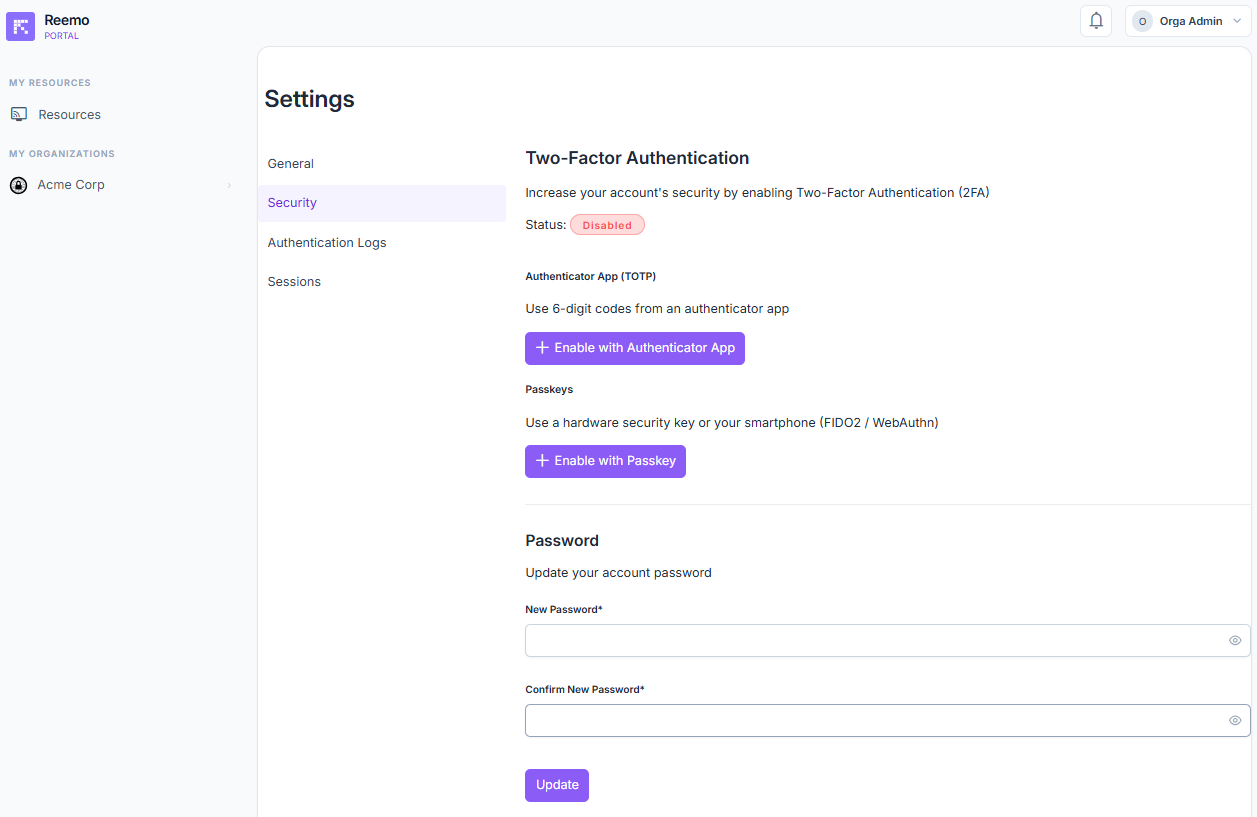
Two-Factor Authentication (2FA)
This section displays whether 2FA is currently enabled or disabled on your account. Click the dedicated buttons to configure or modify it.
Enable with an Authenticator App
When you choose to enable 2FA with an authenticator app, a sub-page opens to pair your device.
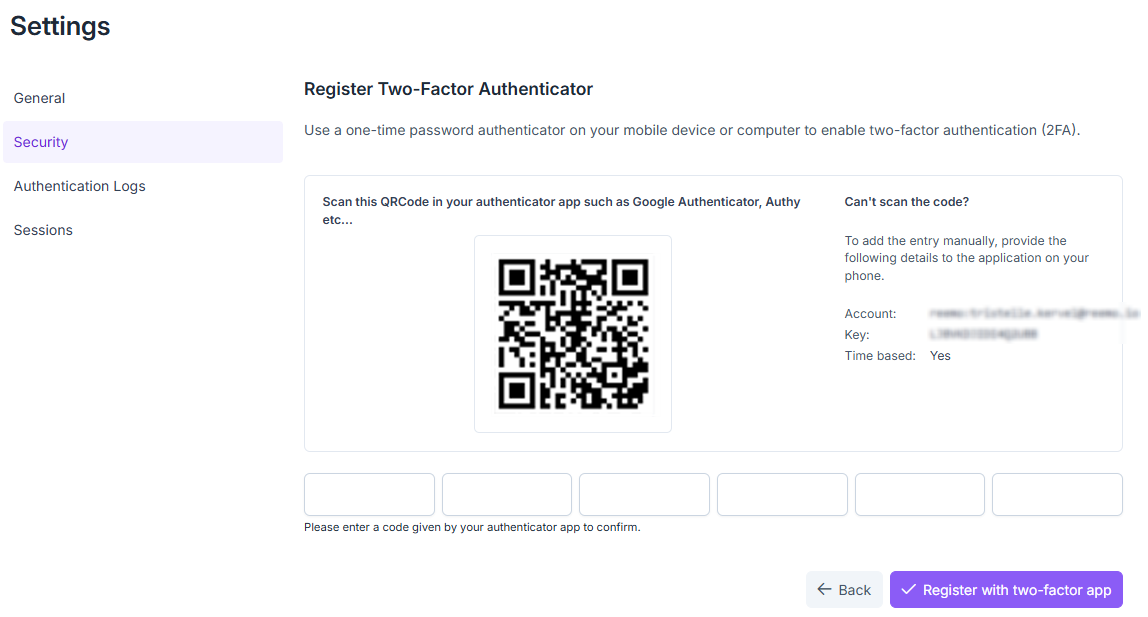
Two-factor authentication configuration sub-page via an authenticator app.
Two methods are available to link your account to an app like Google Authenticator or Authy:
QR Code: Scan the displayed code with your app.
Account + Key: If you cannot scan the code, manually enter the provided credentials.
Enter the one-time code in the provided fields, then click Register with two-factor app to complete activation.
Your recovery codes are then displayed on screen.
Important
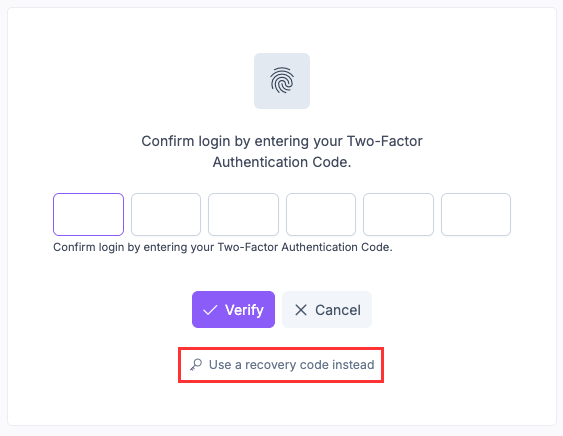
Save these codes in a safe place before continuing: they let you regain access to your account if you lose your authenticator app. During login, click the Use a recovery code instead link to use one.
Recovery codes
Once 2FA is active, click the Manage button to:
Disable two-factor authentication.
Renew your recovery codes.
Enable with a Passkey
When you choose the Enable with Passkey option, a sub-page opens to finalize your authentication device registration.
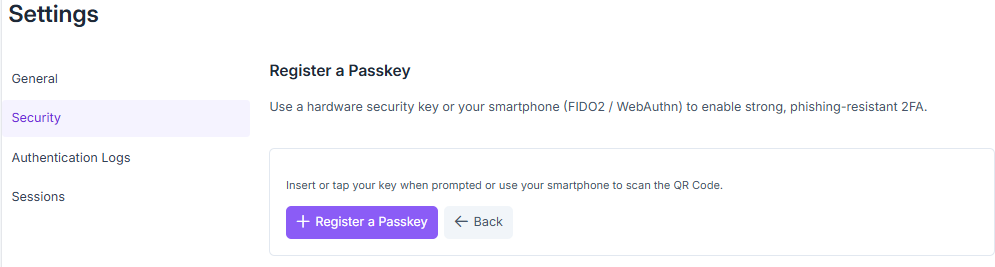
Two-factor authentication configuration sub-page via a passkey. Follow the instructions provided by your browser to create and register a new Passkey. Once created, it securely links to your account for future logins.
Important
Passkeys provide an additional layer of security to your account. They do not replace your password but work alongside it to offer enhanced protection.
Note
Change Password
Update your credentials by entering your current password followed by your new password.
USB Devices
Manage the list of USB devices automatically forwarded to your remote sessions, from the start of the session and without having to open the USB panel.
To add an automatic USB redirection:
Provide the Vendor ID, Product ID, and a Name to identify the device.
Click Add a device to save it.
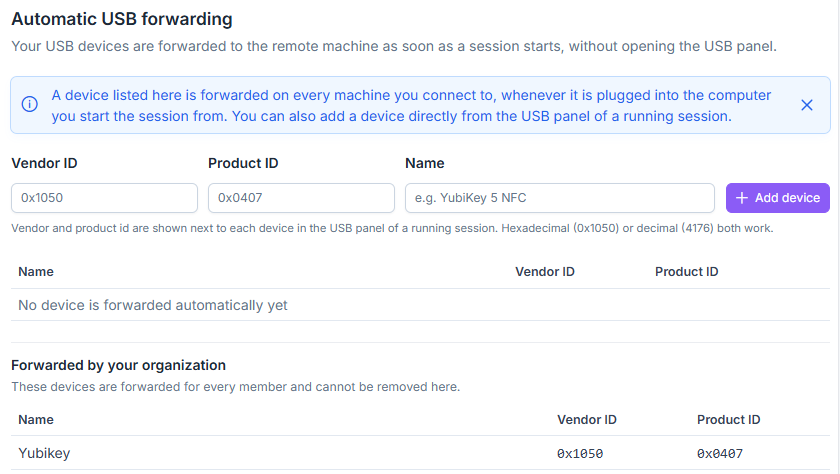
The USB Devices section for your account, listing devices forwarded automatically.
Vendor ID and Product ID: identifiers of the USB device, displayed next to each device in the USB panel of an ongoing session. Both hexadecimal (e.g.
0x1050) and decimal (e.g.4176) formats are accepted.Name: a name of your choice to identify the device in the list (e.g.
YubiKey 5 NFC).
Each device in the list can then be removed individually.
Note
A device added to this list is forwarded on every machine you connect to, as soon as it is plugged into the computer from which you launch the session. You can also add a device directly from the USB panel of an ongoing session — see Forward a USB Device.
If your organization has configured its own devices for automatic forwarding, they appear below in a Forwarded by your organization section, for information only: they are added to your personal list but cannot be removed from this page.
Active Devices
Check your active sessions and revoke those you do not recognize. This section lists the browsers and devices currently connected to your account.
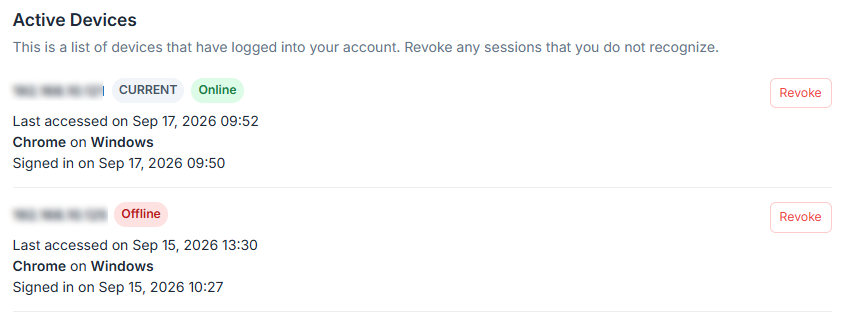
The Active Devices section displaying connected sessions, IP addresses, online status, and the browser used.
The available information for each session is:
IP Address: Public IP address used for the connection.
Status: Indicates whether the session is Current and whether the device is currently Online.
Last Access: Date and time of the last activity from this browser or device.
Browser + OS: Information about the software used for the connection (e.g. Chrome on macOS).
First Connection: Date and time of the first recorded login on this browser.
A Revoke button allows you to end an active session. This action immediately disconnects the corresponding browser or device.
Note
Use this section to monitor access to your account. If you notice an unknown or suspicious session, revoke it immediately to secure your account.
Important
This section only lists sessions if the instance administrator has enabled the Allow multiple HTTP sessions option in the instance Authentication Settings. Otherwise, it appears empty.
Authentication Logs
Review the history of login attempts to your account to identify the origin and legitimacy of an access attempt.
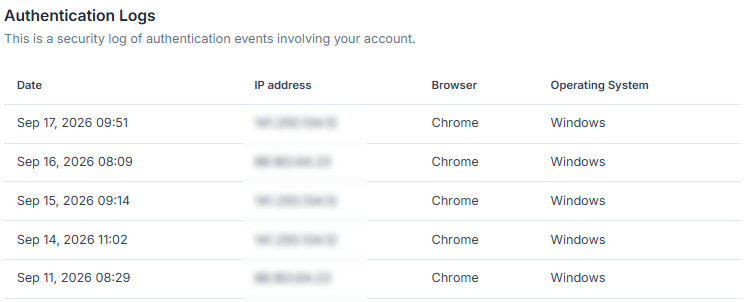
The Authentication Logs showing connection history, including the date, IP address, browser, and operating system.
The available information for each authentication attempt is:
Date: Exact date and time of the login attempt.
IP adress: Public IP address used for the connection.
Browser: Browser used (e.g. Chrome, Firefox).
Operating System: Operating system used during the connection (e.g. Windows 11, OS X 10.15).
Note
This section is particularly useful for detecting suspicious logins. Regularly check the IP addresses, browsers, and operating systems to identify any unusual attempts to access your account.
Sessions
Track the history of your connections to remote computers and containers — duration, machine used, and type of connection established.
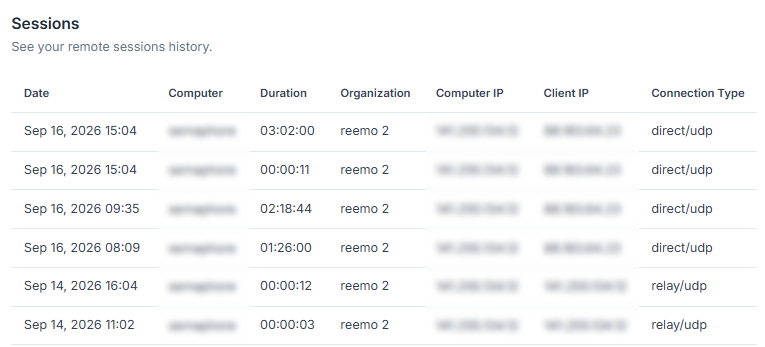
The Sessions section displaying past sessions and their technical details.
The available information for each session is:
Date: Date and time of the connection.
Computer: Remote computer or container to which the session was opened.
Duration: Total duration of the remote session.
Organization: Organization the machine belongs to (empty if the machine is a personal computer).
Computer IP: Public IP address of the remote workstation.
Client IP: Public local IP address of the device that initiated the connection.
Connection Type:
direct/udp: Direct connection (Highest performance).relay/udp: Connection routed via a relay server over UDP.relay/tcp: Connection routed via a relay server over TCP.relay/websocket: Connection routed via a relay server over WebSocket (Fallback).
Note
This section helps you understand the quality of your connections and identify potential network issues. A direct/udp status is recommended for better performance.