Reemo Toolbar
The Reemo toolbar gives you access to a set of essential features to enhance your remote desktop experience. By default, it is displayed at the top of your session and groups the main controls.
This page covers the toolbar itself — its icons and the connection indicator. For everything configurable through it (video quality, display, input, USB, file transfer, diagnostics…), the toolbar opens its own Settings panel, covered in the pages that follow this one.

Overview of the Reemo toolbar under optimal connection conditions (direct/udp).
Toolbar Icons
From left to right, the toolbar includes the following icons:
Icon |
Name |
Description |
|---|---|---|
drag_indicator |
Move toolbar |
Allows repositioning the toolbar on the screen. |
desktop_windows |
Screen selection |
Appears only if multiple monitors are connected to the remote machine. Each icon corresponds to a monitor and allows switching the display. |
public / public_off |
Connection status |
Combines the connection type and latency (in ms) into a single badge. The icon and color indicate the type of connection (green globe for direct, orange crossed-out globe for relay) — see Connection Type below. Click it to open the Stats tab directly. |
group |
Peers list |
Displays users connected to the session simultaneously. Allows disconnecting a user or enabling/disabling their mouse and keyboard access. |
mic |
Microphone selection |
Appears when a remote application requests access to the microphone. Allows choosing which physical device to use. |
videocam |
Webcam selection |
Appears when a remote application requests access to the webcam. Allows choosing which physical device to use. |
volume_up |
Volume control |
Adjusts the remote session’s audio volume. |
crop_free |
Fullscreen mode |
Switches to fullscreen view. |
tune |
Settings |
Opens the Settings panel, which groups advanced configuration options by category (quality, display, input, USB, file transfer, diagnostics…). |
power_settings_new |
Disconnect |
Ends the remote session. |
Connection Type
A specific icon appears in the toolbar to indicate the connection status. Hovering over it shows a tooltip explaining the current connection, and clicking it opens the Stats tab directly.
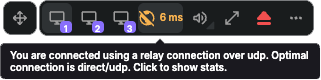
Example of a relay/udp connection, indicated as non-optimal.
- Possible connection types:
direct/udp → Optimal connection (low latency, high performance).
relay/udp → UDP relay connection, used if direct/udp is not possible.
relay/tcp → TCP relay connection, slower and more sensitive to packet loss.
relay/websocket → Fallback connection, used only if others are not available.
- The icon and color of the latency indicator reflect the connection status:
public Green: optimal direct connection (direct/udp).
public_off Orange: connection via a relay (relay/udp, relay/tcp, or websocket).
Peers List
Click this icon in the toolbar to open the list:
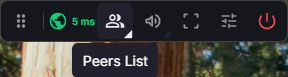
Peers List icon in the toolbar.
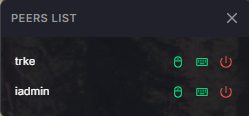
Peers List panel.
This panel lists every user currently connected to the session. For each user, you can:
Toggle their mouse and keyboard access on or off.
Disconnect them from the session.
Microphone and Webcam Selection
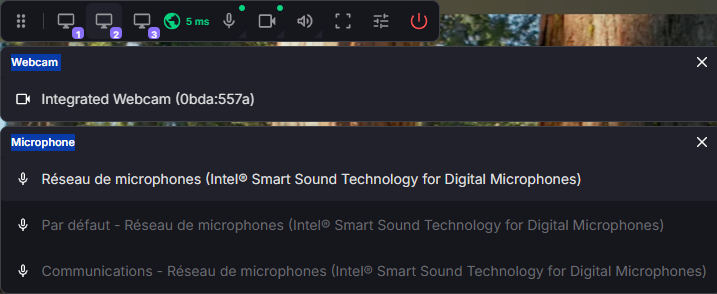
Microphone and webcam selection panels.
These panels appear automatically when an application on the remote machine requests access to the microphone or webcam (for example, during a video conference). Each panel lists the physical devices available on the client machine and highlights the one currently selected — useful if multiple microphones or webcams are connected.
The Microphone and Webcam panels are independent: each appears only when the corresponding access is requested. They are shown stacked together, as above, when both are requested at once (typical of a video call); an audio-only call, for example, only opens the Microphone panel.
Note
This menu is displayed only when the remote application requests permission: it is not part of the Settings panel.
Important
When an application on the remote machine prompts you to choose a device, select Reemo virtual microphone or Reemo virtual webcam.
Volume Control
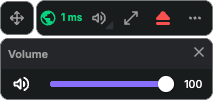
Volume control menu.
The volume control menu allows adjusting the audio volume sent from the remote machine.

Red VIEW ONLY badge shown in a read-only session.
Note
In a View session, a red VIEW ONLY badge appears at the right end of the toolbar to remind you that keyboard and mouse input are disabled — see Starting a Session in View-Only Mode.
Touch Controls
When the Reemo agent detects that you are connecting from a mobile device (or a reduced/touch viewport), it automatically displays a help panel explaining how to control the remote screen with touch:
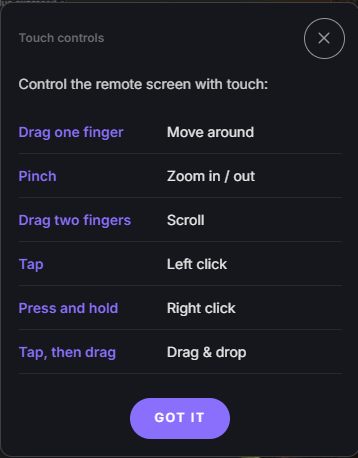
Touch controls help panel.
Drag one finger: move around
Pinch: zoom in / out
Drag two fingers: scroll
Tap: left click
Press and hold: right click
Tap, then drag: drag & drop
Tap GOT IT to dismiss the panel.
On a mobile device, the toolbar also includes two additional icons not present on desktop:
Help (question mark): reopens the touch controls panel at any time.
Keyboard: displays the on-screen keyboard, useful when no physical keyboard is available.
Continue to the Settings panel for the rest of the toolbar’s configuration options.
Settings Panel
The Settings panel is part of the Reemo toolbar: it groups every advanced configuration option for your session, one click away from the toolbar itself. Open it by clicking the Settings icon (sliders icon).
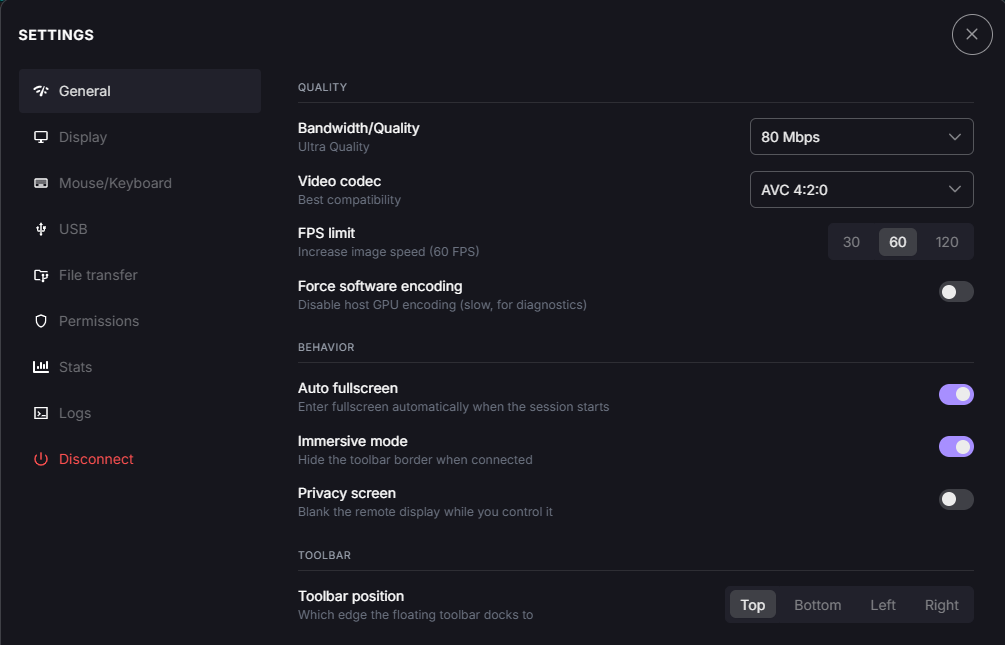
Settings panel, with its sidebar (General selected).
The panel is organized as a sidebar with the following categories:
network_check General: video quality, codec, frame rate, and toolbar behavior.
desktop_windows Display: monitor layout, resolution, and scaling.
keyboard Mouse & Keyboard: input modes and keyboard behavior.
usb USB: USB device forwarding to the remote machine.
folder_data File transfer: uploading and downloading files.
shield Permissions, finance Stats, and terminal Logs: session diagnostics, grouped together in Diagnostics.
At the bottom of the sidebar, Disconnect ends your session immediately — it is an action, not a configuration category.
Opening and Closing the Panel
Click the Settings icon in the toolbar to open the panel. It is displayed as an overlay above the remote session and does not interrupt your work — the remote machine keeps running normally while the panel is open.
Close it by clicking the × button in the top-right corner, or by clicking outside the panel.
Note
Settings apply immediately: there is no separate “Save” step. Changing a value (for example, the bandwidth or the video codec) takes effect as soon as you select it.